Another frustrating issue with the Mil Horse at least for me is the lack of more detailed morphs to add expression to the Mil Horse’s face/head. The Mil Foal is really lacking in this regard, as well as not even having many of the Mil Horse Head Morphs. Horses actually have very mobile and expressive faces. Yes their expressions in general are less visually blatant than say a person’s; anyone who spends much time around horses will tell you how expressive their horse’s faces are.
Now I’ve grumbled about all that, I am going to get into what you CAN do to give your Mil Horse a more expressive face. It’s a large subject to cover so I am going to break it up into 4 consecutive blog posts:
1. Posing of the Head, Neck and Ears/Morphing the Muzzle & Nostrils
2. How Your Camera Settings Affect the Expression
3. The All-Important Eye and Postworking the Eye
4. More Emotions/Expressions Explored
We’ll start here with basic posing and how that will affect the horse’s facial expression.
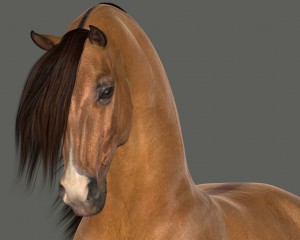
Here is the Mil Horse in total default mode
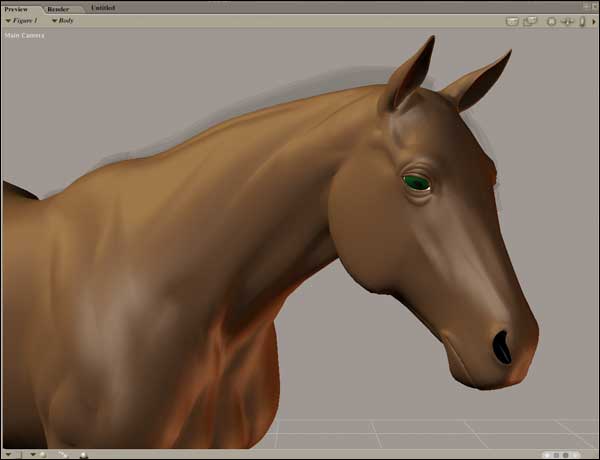
Pretty darn bland. Not a horse I want to spend much time around or make a picture of:)
So first we need to think about the overall emotion and attitude we want in our horse image – noble? sleepy and content? Running free in pure joy? sharing a tender moment with a friend? and so on. The basic posing of the head, 3 neck parts and the ears can go a long way to establishing the expression and feeling we want our horse to evoke.
Let’s do a horse that is noble with freedom and joy – here the overall posing of the horse’s body will reinforce the facial expression, but we are just going to focus here on trying to make the head, neck and ears (with a little help from the Chest) do it for us. So let’s start.
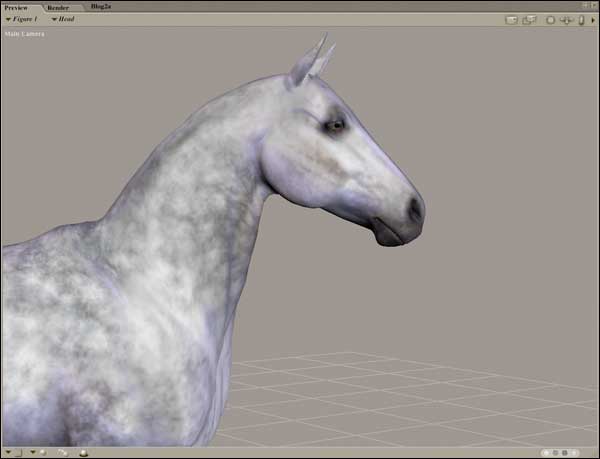
Load the default posed Mil Horse figure into your scene. I would suggest going ahead and loading a texture for the horse, even if it ends up not being your final choice, as it will give you more expression right away and visual feedback as you pose. Here I have loaded the CWRW Pro Textures for the Mil Horse “Dapple Grey” and to keep our attention focused I have “turned off” the forelocks and mane so they are no longer visible; Y rotated his body to 45º (a 3/4 view) and zoomed the Camera in on the neck and head. (We will talk a lot more in our next blog post about how the Camera angle and settings can also reinforce the feeling and expression we want to convey in our image.)

Still pretty dull…
Our noble horse running with freedom and joy will proudly arch and raise his neck with his head held high. (He might buck with joy etc but since we are looking to achieve the look with just the head, neck and ears we won’t let him buck right now:)
So let’s start with the 3 parts of the neck.
First we’ll select Neck 1 – BEND it -25º to -30º
Neck 2 – BEND -15º
Neck 3 – BEND 18
Now Head – BEND 11
Here is our basic arched high-set neck. A decent start. I’ve rotated the camera so we can see the arch of the neck more clearly. You almost always want to play with the bend of all 3 neck parts and the head to get a pretty even arch throughout the neck. Note that the more you BEND Neck 1 back the withers get a little funny looking- don’t worry too much about that as between postwork and adding a mane you won’t see the withers that much anyway.
Now here is a simple morph to add more nobility and arch to the neck. Select BODY and set the morph “Neck Round” to what you like. Play with it. Here I’ve set it to 1.0. Personally I normally set it from 1.0 to 1.5 for most of my poses/images.
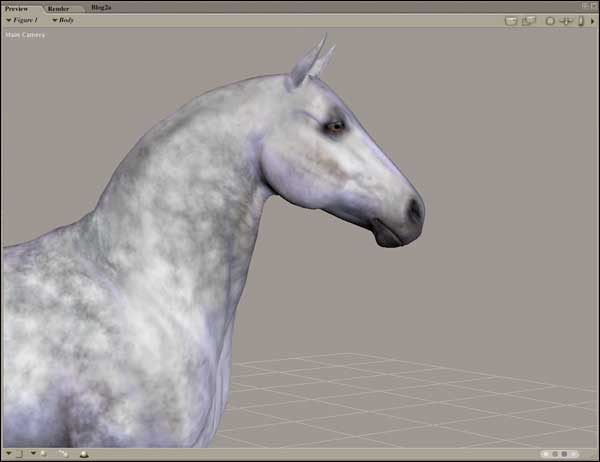
Another posing trick I use often to raise the neck/head to add more nobility is to bend the Chest back towards the Abdomen (raise it in other words). A horse in real life raises the withers up as he raises his head and neck. With the Mil Horse we can’t directly do that to the withers so I use this trick to achieve the same thing. You may find you want less bend to Neck 1 and even more bend to the Chest. Play with it.
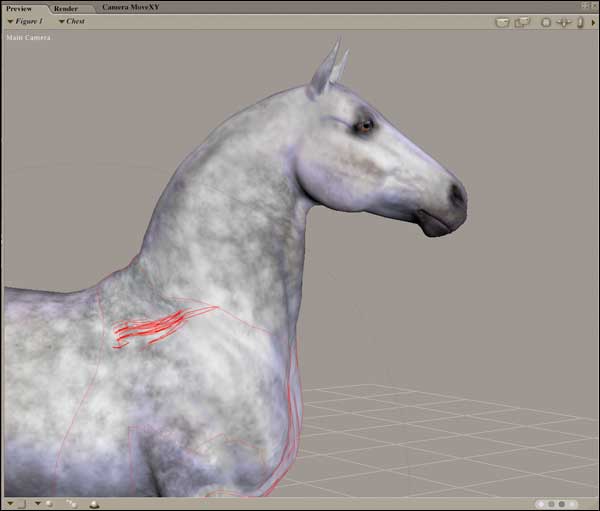
Our horse is starting to look more noble now and we haven’t even done anything yet with the head, ears or eye!
So far we’ve been posing on one plane in BENDING these parts of the horse. Let’s add some Twist and Side-to-Side Transformations to give him more expression and add more realism to the pose. I usually use Side-to-Side and Twist of the Neck parts pretty tactfully as the Mil Horse’s neck just doesn’t have the range of movement a real horse does so it gets looking strange and unnatural quickly.
First I Twisted the Chest 9. Anytime a horse is in motion they usually have one shoulder higher than the other to varying degrees depeding on the gait and the part of the stride of the gait. Since the Mil Horse can’t raise the upper part of the scapula I use this to simulate a similar feel.
Neck 1 – Twist 3, Side-to-Side 10
Neck 2 – Twist -6, Side-to-Side -3
Neck 3 – Twist 6, Side-to-Side 6
Head – Twist 6, Side-to-Side 14 ( You can go more extreme with Twisting snd StS for the Head)
So now our horse is really starting to come to life – I’ve rotated the Camera around again to add more angle to his body and add interest to the pose. But now I don’t like the the front center part of his neck as it is looking kind of bulgy. Just play with the Bend, Twist and StS of Neck 2 to correct. In this case I changed the setting of Neck 2 to Twist – 3, StS – 2, Bend -2. It still has a small bulge but we can always postwork that in Photoshop if desired.
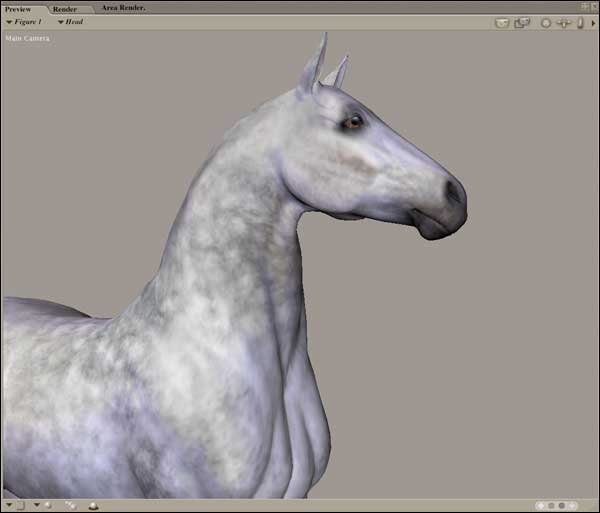
So now we’ll look at the Ears. The Ears default position is pretty good for this pose- forward and attentive. We can reinforce that expression by doing just a little Transforming:
Right Ear – Twist -6, StS -2, Bend 9. I also Y Scaled the Right Ear to 60% and set the Morph pEarCurl to .35
Left Ear – – Twist -9, StS -8, Bend 10. I also set the Morph pEarCurl to .475
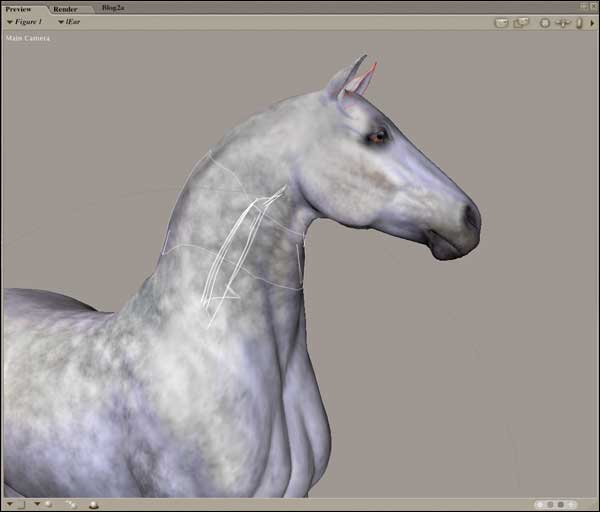
Now we’ll start working on his Head using the Head Morphs to add expression. A horse that has his attention absorbed or stimulated by something in his environment will almost always have his nostrils raised and flared to varying degrees. My Morgan gelding Tomahawke has very expressive nostrils:) I normally exaggerate these Morphs as it is one easy way we have to add more expression to the Mil Horse’s face. (One thing I really wish is that each nostril could be morphed individually as some of the most fun expressions a horse can have he moves each nostril differently.)
Here is a render of the Head with various Nostril and Muzzle Morphs
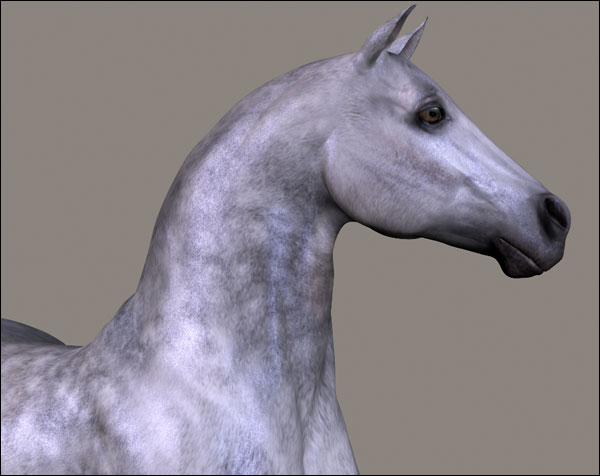
NostrilBig – 1.0
Nostril Raised – .7
Nostril Flared – .7
MuzzleSmooth – -6
IndentMuzzle – 1.0
I also did NoseCurve just a little – .13 and set JawBig to about .5
Since our pose here is more of a profile I didn’t shorten or lengthen the muzzle as I like the way it is looking. (MuzzleShort – dialing to the left makes it longer; to the right, shorter.) If I was doing a pose more of the front of the horse’s head I might lengthen or shorten the muzzle as needed. Another example is that Friesian and Andalusian horses typically have longer heads/muzzles while say a Morgan horse often has a wide forehead with a shorter & smaller muzzle.
So pretty good without even touching the eye yet! In my next post we will look at how the Camera Settings can reinforce the attitude and expression we want our horse to have. Shortly after that we will tackle the all-important Eye! And in the near future I will talk about postworking the nostrils to help bring more range of expression to our Mil horse artwork.
A note- you might want to save your work to date as I will continue with this same pose etc for the next 2 parts of this tutorial. If not, I will have a link to download this pose/morph in the next blog post, so you can work along with me.
Til then, happy rendering!
Laurie
